
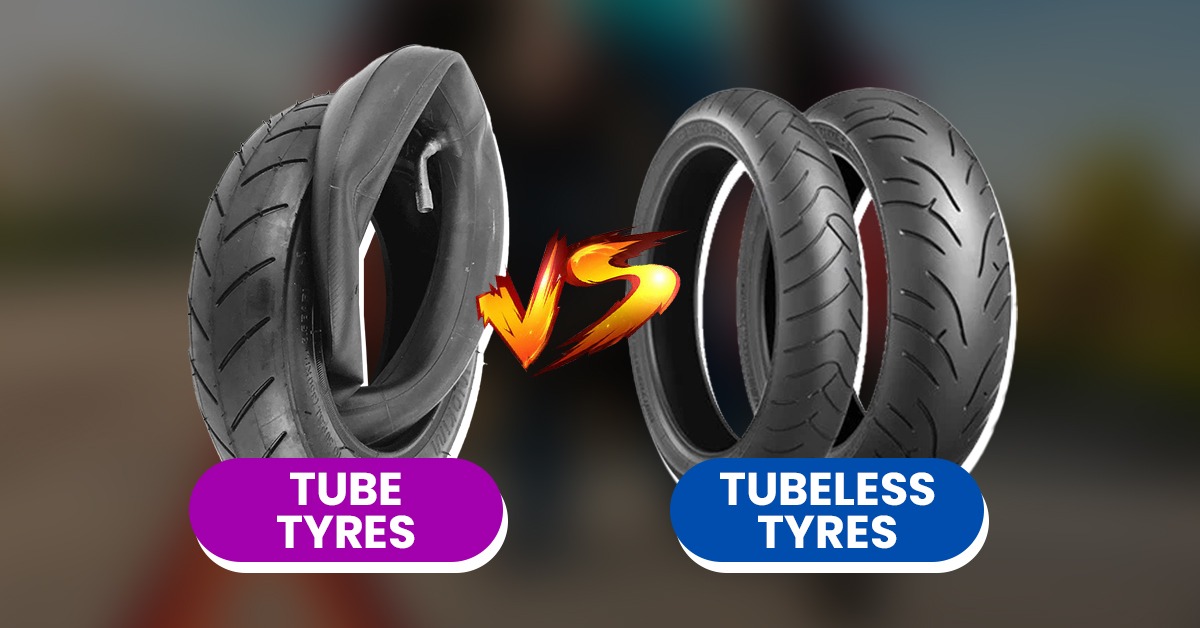
Tyre repairs vary greatly between tube tyres (with an inner tube) and tubeless tyres (sealed to the rim). In general, tubeless tyres are safer and easier to patch on the road, while tube tyres require more disassembly (removing the wheel and tyre) to fix or replace the tube. This report compares both systems, covering construction differences, common failures, step-by-step repair methods, necessary tools, and safety/legal limits. Key takeaways: Tubeless tyres leak more slowly and can often be temporarily fixed using plugs, patches, or sealant without removing the tyre. Tube tyres, found on many motorcycles, bicycles, and some cars, need the tube patched or swapped and always require demounting the tyre.
Tyre Construction: Tube vs Tubeless
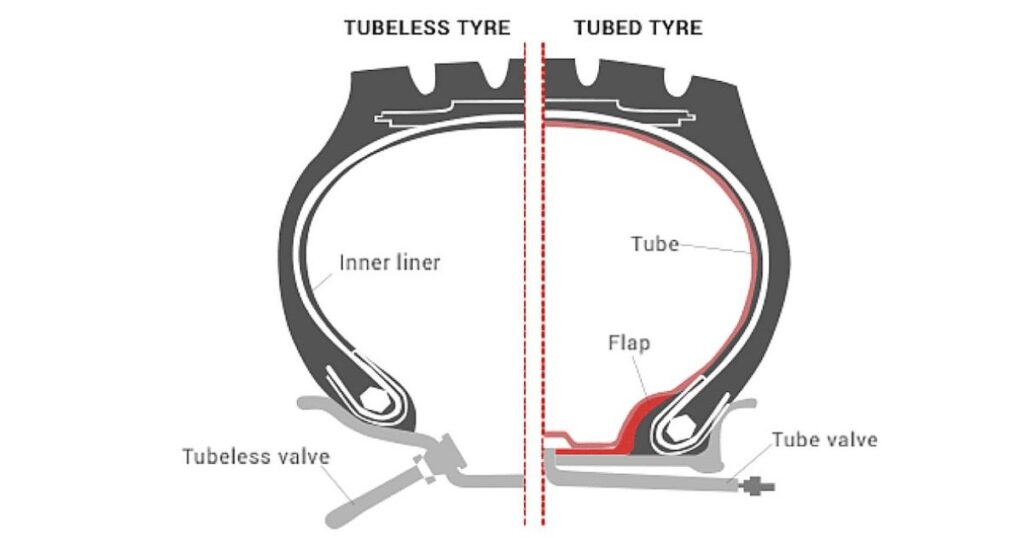
- Tube Tyre: Contains a separate inflatable inner tube inside the tyre. The tube holds air, while the outer tyre provides traction and protects the tube. The tube sits inside a tyre that’s fitted onto a multi-part rim or a flanged rim. The valve stem is part of the tube. Any puncture that lets air escape means removing the wheel and tyre to access the tube.
- Tubeless Tyre: Has no inner tube. Instead, the tyre’s inner liner (a plastic/rubber lining) seals air between the tyre and the rim. The rim must be airtight, and a metal valve is fixed directly to the wheel. When punctured by a small object (nail, screw), air leaks only through that hole, not between tyre and rim, so the tyre deflates more gradually. This provides more time and warning to stop.
Advantages of Tubeless: Bridgestone notes tubeless tyres leak slowly and are easier to repair immediately (often without removing the wheel). They improve safety (drivers can control the car longer on a slow leak) and fuel efficiency (lighter weight). This is why most modern cars come standard with tubeless tyres.
Advantages of Tube Tyres: Simpler structure in rugged settings; often used on motorcycles, bicycles, or older vehicles. They can be cheaper to produce and easier to replace in bulk for bikes. However, a tube puncture causes instant deflation (air escapes between tube and tyre) and repair is more laborious.
Common Puncture Scenarios
- Sharp Object in Tread (most common): A nail or screw pierces the tyre surface. In a tube tyre, this leaves a hole in the tube; in a tubeless tyre, a hole in the liner. Usually repairable if small (<6 mm).
- Sidewall Damage: Cut, chunk, or tear on the sidewall. Both tube and tubeless tyres cannot be safely repaired here because the sidewall flexes under load. Replace the entire tyre (or rim/tire assembly) instead.
- Valve/Bead Leak: Air leaks around the valve stem or tyre bead on the rim. Tubeless tyres: reseat the bead or replace valve if leaking. Tube tyres: usually a faulty valve or pinch. Replacement needed.
- Rim Damage: A bent or broken wheel rim puncturing the tyre/tube; tyre may not seal to rim. Inspect rim; often needs professional repair or replacement of rim/tyre.
- Run-Flat Condition: For run-flat tubeless tyres (reinforced sidewalls), driving flat can cause internal damage. Most standards say not to repair a run-flat that’s been driven on (ride mileage up to 50 miles/80 km at ~80 km/h)
Tube Tyre Repair

- Remove Wheel and Tyre: Park safely, chock the wheel, jack up the vehicle, and remove the wheel. (Hazard lights on and wheel chocks are critical safety steps.) Use tyre levers to pry the tyre beads off the rim and remove the inner tube.
- Locate Puncture: Inflate the removed tube slightly. Submerge or use soapy water to find air bubbles. Mark the hole(s).
- Patch or Replace Tube:
- Patch: Use a tube patch kit (sandpaper, vulcanizing cement, and patch). Scuff area around hole, apply cement, let tack, then apply the patch and hold firmly. Wait per instructions. Tube patching is permanent if done right. Check compatibility: most kits specify max hole size (~8 mm).
- Replace: If the tube is shredded or old, or holes too large/multiple, use a new tube instead (spare tube). Inner tubes are sold by tyre size (e.g. 26×1.95 for bikes, 175/70R13 for cars).
- Reinstall Tube and Tyre: Slightly inflate the tube to give shape, insert it into tyre, then mount tyre back on rim, carefully tucking tube inside. Ensure tube isn’t pinched. Fully inflate to correct pressure.
- Refit Wheel: Bolt wheel back on, lower vehicle, and tighten lug nuts. Check pressure with gauge (car tyre gauges or bicycle pumps for bikes).
- Test: Verify no slow leak and that the tyre holds pressure. Drive briefly to confirm fix.
Safety: Always use gloves; avoid over-stretching or pinching tube. Check tyre inside for embedded object before reassembly.
Tubeless Tyre Repair
For tubeless tyres, you have more options without removing the wheel (for quick fixes):
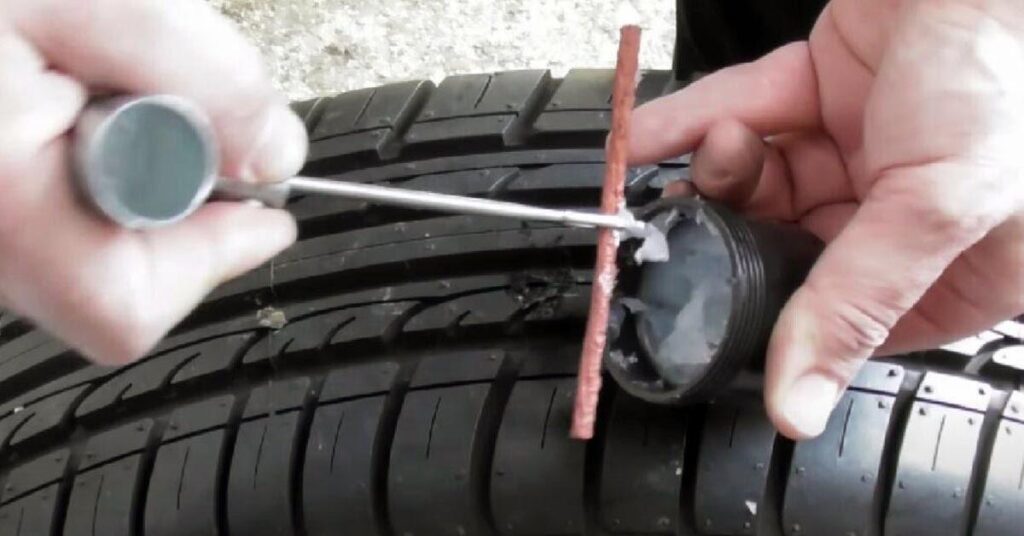
- Plug (Threaded Plug/Tire Worm):
- Insert a spiral reamer/rasp into the hole to clean and enlarge it slightly.
- Thread a sticky rubber plug (with insertion tool) halfway.
- Push plug into hole until only a small bit is outside, then remove tool, leaving plug embedded. Cut off excess plug flush with tyre.
- Inflate tyre and check for leaks.
- Combined Plug+Patch (Mushroom Repair): Usually done at a shop after removing tyre. A mushroom-shaped repair has a stem (plug) through the hole and a patch on the inside securing it. This is the most permanent fix per industry standard. Not feasible on roadside without demounting.
- Liquid Sealant (Spray/Fix-A-Flat): Temporary fix only. The can injects sealant and pressurized air into the tyre. Sealant coats the puncture from inside and inflates the tyre enough to drive a short distance. Do not rely on it long-term; get a proper repair soon. (Note: sealants can damage TPMS sensors and complicate true repair later.)
- Use a Plug Kit: Commercial kits (e.g. Slime, Milenco) combine rasp, plug insertion tool, and plugs. Follow kit instructions. A good kit often repairs holes up to ~6mm safely.
- Do nothing/Roadside Assist: If the puncture is large, on the sidewall, or wheel is damaged, fit a spare or call a mechanic.
Safety: For any roadside fix, ensure vehicle is parked flat on the shoulder, hazard lights on, and tools are secured before working. Only attempt DIY fixes when conditions allow.
Safety & Legal Guidelines
- Do Not Repair Sidewalls or Shoulder Punctures: Industry standards (BS AU159, EU Tyre Label) forbid repairs outside the central tread. A cut or bulge on the sidewall requires replacement.
- Size Limits: Punctures up to ~6 mm in the tread can be repaired. Michelin specifies “cuts up to 6 mm and angle <15° in tread”. Larger holes (or slashes) mean tyre failure.
- Run-Flat Tyres: After run-flats have been driven on, Michelin/TyreSafe advise not repairing them, as hidden damage may exist.
- Check Tread Depth: If the tyre is at or below legal tread limit (often 1.6 mm), even a repairable puncture should prompt a replacement for safety.
- Professional Inspection: Permanent repairs should be done by a qualified repairer. DIY kits are for emergencies only. TyreSafe warns all permanent repairs must follow standards.
- Road Safety: Never attempt major repairs on high-speed roads. Activate hazards, set up safety triangles, and exit carefully. If a shoulder is not safe, drive to a service area
Frequently Asked Questions
- Can I repair a tube tyre puncture on the road?
Yes, but only if you have the tyre off the wheel. You must remove the wheel, tyre, and either patch the inner tube or replace it with a spare. You can’t fix a tube tyre while it’s still mounted with the wheel on the car. - How do I patch an inner tube?
Inflate the tube slightly, find the hole, and mark it. Use a tube patch kit: roughen the area, apply vulcanizing glue, let it tack up, then apply the patch and press firmly. Wait the recommended time before reinflating. Check the patch holds before reinstalling. - Is a tubeless tyre puncture easier to fix than a tube tyre?
Generally, yes. Tubeless repairs often do not require tyre removal: you can plug or seal a small hole from outside, then re-inflate. Tube tyres always require dismounting the tyre to get at the tube. A plug kit for tubeless can be carried in the car for roadside use. - How large a hole can I safely repair?
For both systems, keep it to small punctures. Industry guidance (Michelin, TyreSafe) is up to about 6 mm in the tread. Tubeless plug kits also generally cap out around 6 mm. Anything bigger (or any cut/tear) means replacing the tyre. - Can I use liquid sealant on tube tyres?
No. Tube tyres cannot be sealed with spray sealant like Fix-A-Flat. The sealants are designed for tubeless systems. Tube tyres require patching or a new tube if punctured. - What tools should I keep in my car for tyre repairs?
For tubeless tyres: keep a plug kit (with reamer and plugs), a mini compressor or pump, and a can of sealant. For tube tyres: carry a spare inner tube or patch kit and tyre levers. In both cases: jack, lug wrench, wheel chocks, and safety triangles are vital. - Are puncture plugs permanent?
No. Even if a plug stops the leak temporarily, you should have a tyre professional inspect and do a proper patch and plug or replacement. Plugs leave the hole slightly open inside and are not as durable as internal patches. - What if I fix a puncture myself and it still leaks?
If it still leaks, don’t drive long. Re-check the patch/plug. If it’s not sealing, you must either replace the tube or tyre or call roadside assistance. Do not keep driving on a leaking tyre – the rim may be damaged or the tyre could blow. - Can run-flat tyres be patched after a puncture?
Generally not. Run-flats should only be driven on briefly (up to ~50 miles at ~50 mph) after a puncture. After that, Michelin and TyreSafe say their structure is likely weakened, making repairs unsafe. Replace a run-flat after use.
Leave a Reply